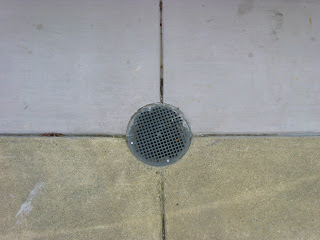
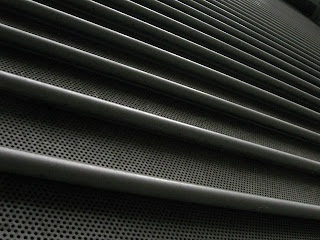
In this series I selected eight photographs from my previous drafts that I felt best embodied the minimalist aspects and themes of my project. The majority of the photos focus on simple geometric shapes and have limited color pallets, thus magnifying the minimalist aspects of the pictures. All of the photos were taken in and around Drew over the course of a week and a half with five coming from the first draft and three coming from the second draft.
Thursday, December 8, 2011
Minimalism: Second Draft
This set of photos is a continuation of the minimalist pictures in the previous post. I adhered to many of the techniques used in the previous draft, however I attempted to focus on different areas of the neighborhood around Drew that I had not yet photographed.
Thursday, December 1, 2011
Minimalism: First Draft
For the final project I choose to focus on minimalism. I was able to try and take many of the techniques learned over the course of the semester, put them into practice and apply them to minimalist photography. I tried to focus my pictures on either simple geometric shapes or simple, two dimensional surfaces. Many of the pictures are taken from a very close perspective in order to isolate the subject and reduce the distractions that stem from the surrounding world. These seven pictures are the photos taken that I feel best fulfill my criteria.
Wednesday, November 2, 2011
In this assignment our goal was to use toys in conjunction with fixed backgrounds to create a photo that had some sort of narrative sequence or setting. My process was to go in without any preconceived notions about what I wanted to photograph and find a toy that had some sort of interesting quirk or one that could demonstrate character. In the case of the teletubby the face has a creepy blank stare that brings the toy to life, in the case of the hardwood manikins they are able to pose and interact with each other in a way that other toys cannot and in the case of the cowboy his figure has a stern posture that exhibits feeling and creates a more interesting character. After I had picked the figures I would use a computer and search for a background that I felt had a story associated with it, find the highest resolution version of the picture and pose the toy or toys in front of it. Once the scene was set I would put the camera on a low f stop in order to blur the background. The idea was to make the toy feel as though it fit into that scene and to make the background feel as real as possible instead of as an image on a screen.
Saturday, October 22, 2011
Avedon-Inspired Portraits
This assignment was inspired by the work of photographer Richard Avedon (www.richardavedon.com). Many of Avedon's collections focus on a single model being photographed on a simple background in black and white with the idea that the viewer is able to connect with that character on a deeper level that the simple action that was taking place at the moment the photograph was taken. I attempted to emulate this technique by having the model stand in front of a white background a bring to mind a specific memory or thought that was associated with a specific emotion or photographing them while they told me a story. This assignment helped me both realize and combat the difficulties of working with a human subject as apposed to an inanimate one as well as identify the positive nature of the subjects ability to convey emotion.
Thursday, October 6, 2011
Repetition
We are continuing are unit on depth by adding repetition to our photography. The idea behind this technique is that the photographer finds an object or scene that repeats itself while moving into the background thus tricking the mind into seeing a leading line moving from the foreground to the background and giving the illusion of three dimensional space. For example you could photograph down a street looking at several parking meters and while the parking meters are not actually connected they are organized in such a way that the viewer sees a leading line.
Thursday, September 29, 2011
Foreground/Background
This project was a continuation of our study in depth and immersion in the photograph. This week we focused on having objects or subjects in the foreground, or the front of the picture, and the background, or the rear of the picture. The space between the two objects would then create a sense of depth within the photograph allowing the viewer to have a more profound experience.
Leading Lines
The idea behind this assignment was to draw the viewer into the photo by adding a sense of depth. The way that we accomplished this for this portion of the assignment was to add something called a leading line to our photos. A leading line is an object or formation that passes from the front of the picture, or the foreground, to the rear of the picture, or the background, thus giving a sense of depth to the photo.
Subscribe to:
Comments (Atom)


